Last time, we learned the basics of WebRTC broadcasting and explored a simple peer-to-peer example. We also discovered that this approach adds a heavy load on the presenter side. Because of this, we concluded that peer-to-peer isn’t an option for a production-like application.
In this post, we’ll show you how to eliminate this problem with a media server. Media servers take part of that load and allow users, including the presenter, to maintain a single connection for the broadcast. Let’s get started!
Communication flow with media servers
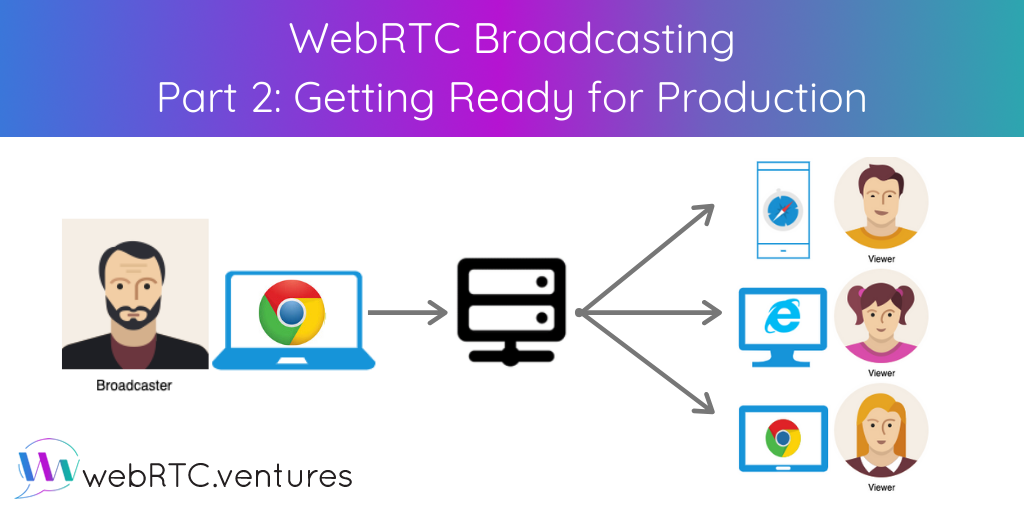
A media server sits between the broadcaster and the viewers. When you add a media server, the communication workflow looks like this:

As a presenter, instead of having to maintain one connection per viewer, you can maintain only one connection. You’ll rely on the media server to deliver the media to all the other participants. This minimizes the load on the client side and allows you to support more users in a broadcast.
The messaging flow with the signaling server also looks different:

This time, the messaging flow looks simpler. This is because almost all of the call logic is in the media server. The most important task the media server performs is creating and connecting WebRTC endpoints. These are the components that are used to build communication between the peers. Using this approach, participants must simply create a single connection with their corresponding endpoint in the media server.
Let’s look at how this looks in a working application when using Kurento as the media server. For simplicity, we’ll install it locally using docker. You’ll probably want to install docker first.
The example code is hosted on Github. If you want to follow along, make sure Git is installed on your computer. Then open a Terminal window, navigate to the folder where you want to store the code, and run the following command:
git clone --single-branch --branch kurento-broadcast \
https://github.com/agilityfeat/webrtc-video-conference-tutorial.git
Here is the folder structure:

The main files are index.html and client.js on the client side and server.js on the server side. We also include a couple of helper files: adapter.js and kurento-utils library.
The application starts with a login screen where the user enters their information and log in either as a presenter or as a viewer.

Once logged in, the client connects to the signaling server, which creates a new “room” for the broadcast. The server also registers the user depending on how they logged in (either as the presenter or as a viewer). To keep things simple, the presenter has to log in first before viewers are able to enter the room. In a real world application, you should add some sort of validation to make sure that it works like this.
public/client.js
...
// login as presenter
btnPresenter.onclick = function () {
  roomName = inputRoom.value;
  userName = inputName.value;

  if (roomName === "" || userName === "") {
    alert("Room and Name are required!");
  } else {
    isPresenter = true;
    const message = {
      event: "presenter",
      userName: userName,
      roomName: roomName,
    };
    sendMessage(message);
    divRoomSelection.style = "display: none";
    divMeetingRoom.style = "display: block";
  }
};

// login as viewer
btnRegister.onclick = function () {
  roomName = inputRoom.value;
  userName = inputName.value;

  if (roomName === "" || userName === "") {
    alert("Room and Name are required!");
  } else {
    const message = {
      event: "joinRoom",
      userName: userName,
      roomName: roomName,
    };
    sendMessage(message);
    divRoomSelection.style = "display: none";
    divMeetingRoom.style = "display: block";
  }
};
...
On the server, we create the WebRTC endpoints for each user and store their information.
server.js
...
switch (message.event) {
            case 'presenter':
                // when joining as a presenter
                createPresenter(socket, message.userName, message.roomName, err => {
                    if (err) {
                        console.log(err)
                    }
                });
                break;
            case 'joinRoom':
                // when joining as viewer
                joinRoom(socket, message.userName, message.roomName, err => {
                    if (err) {
                        console.log(err);
                    }
                });
                break;
...

function createPresenter(socket, username, roomName, callback) {

    // get or create the room if it doesn’t exist
    getRoom(socket, roomName, (err, myRoom) => {
        if(err) {
            return callback(err);
        }

        // create the webrtc endpoint
        myRoom.pipeline.create('WebRtcEndpoint', (err, masterEndpoint) => {
            if (err) {
                return callback(err);
            }

            // get the user information
            const user = {
                id: socket.id,
                name: username,
                endpoint: masterEndpoint
            }

            // check if there is already ice candidates for this endpoint
            const iceCandidateQueue = iceCandidateQueues[user.id];
            if (iceCandidateQueue) {
                while (iceCandidateQueue.length) {
                    const ice = iceCandidateQueue.shift();
                    console.log(`user: ${user.name} collect candidate for outgoing media`);
                    user.endpoint.addIceCandidate(ice.candidate);
                }
            }

            // set how to send ice candidates to client
            user.endpoint.on('OnIceCandidate', event => {
                const candidate = kurento.register.complexTypes.IceCandidate(event.candidate);
                socket.emit('message', {
                    event: 'candidate',
                    userid: user.id,
                    candidate: candidate
                });
            });

            // set this user as the presenter
            myRoom.presenter = user;
            socket.emit('message', {
                event: 'ready'
            });
        })
    })
}

function joinRoom(socket, username, roomname, callback) {
    // get or create the room if it doesn’t exist
    getRoom(socket, roomname, (err, myRoom) => {
        if (err) {
            return callback(err);
        }

        // create the webrtc endpoint
        myRoom.pipeline.create('WebRtcEndpoint', (err, viewerEndpoint) => {
            if (err) {
                return callback(err);
            }

            // get the user information
            var user = {
                id: socket.id,
                name: username,
                endpoint: viewerEndpoint
            }

            // check if there is already ice candidates for this endpoint
            let iceCandidateQueue = iceCandidateQueues[user.id];
            if (iceCandidateQueue) {
                while (iceCandidateQueue.length) {
                    let ice = iceCandidateQueue.shift();
                    console.log(`user: ${user.name} collect candidate for outgoing media`);
                    user.endpoint.addIceCandidate(ice.candidate);
                }
            }

            // set how to send ice candidates to client
            user.endpoint.on('OnIceCandidate', event => {
                let candidate = kurento.register.complexTypes.IceCandidate(event.candidate);
                socket.emit('message', {
                    event: 'candidate',
                    userid: user.id,
                    candidate: candidate
                });
            });

            // notify the presenter about the new user
            socket.to(myRoom.presenter.id).emit('message', {
                event: 'newParticipantArrived',
                userid: user.id,
                username: user.name
            });

            // save the user in the participants list
            myRoom.participants[user.id] = user;
            socket.emit('message', {
                event: 'ready',
                presenterName: myRoom.presenter.name
            });
        });
    });
}
...
After creating a webrtc endpoint, the server notifies the client with a ‘ready’ event. This lets the client know that it can start with the offer/answer mechanism. On the client side, we use the kurento-utils library to create a connection with the newly created endpoint.
For the presenter, this connection will be of the “SendOnly” type because they are the one sending his media. For viewers, the connection will be of the “receive only” type.
public/client.js
...
case "ready":
      if(isPresenter) {
        sendVideo();
      } else {
        receiveVideo(message.presenterName);
      }
      break;
...

function sendVideo() {
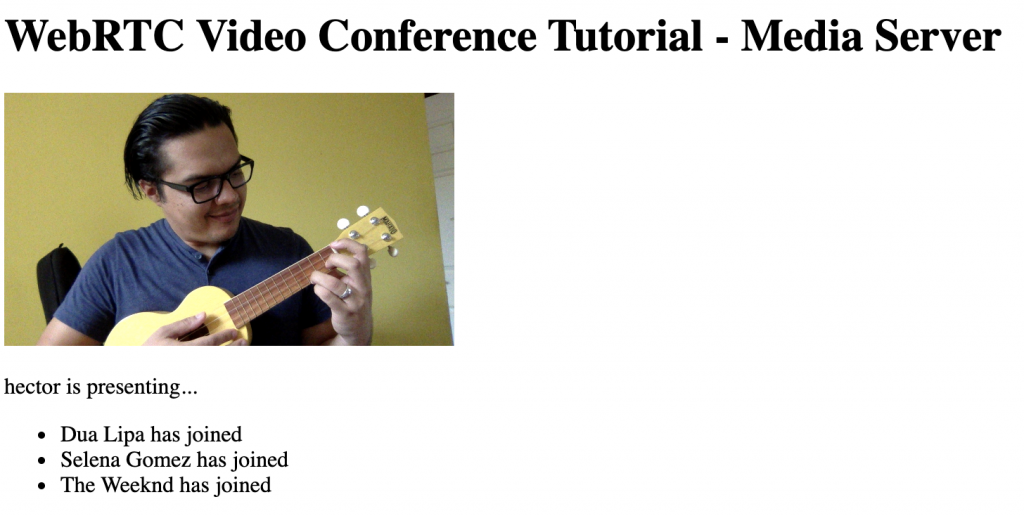
  pPresenterName.innerText = userName + " is presenting...";

  var constraints = {
    audio: true,
    video: {
      mandatory: {
        maxWidth: 320,
        maxFrameRate: 15,
        minFrameRate: 15,
      },
    },
  };

  var options = {
    localVideo: videoBroadcast,
    mediaConstraints: constraints,
    onicecandidate: onIceCandidate,
  };

  rtcPeer = kurentoUtils.WebRtcPeer.WebRtcPeerSendonly(options, function (
    err
  ) {
    if (err) {
      return console.error(err);
    }
    this.generateOffer(onOffer);
  });

  var onOffer = function (err, offer, wp) {
    console.log("sending offer");
    var message = {
      event: "processOffer",
      roomName: roomName,
      sdpOffer: offer,
    };
    sendMessage(message);
  };

  function onIceCandidate(candidate, wp) {
    console.log("sending ice candidates");
    var message = {
      event: "candidate",
      roomName: roomName,
      candidate: candidate,
    };
    sendMessage(message);
  }
}

function receiveVideo(presenterName) {
  pPresenterName.innerText = `${presenterName} is presenting...`

  var options = {
    remoteVideo: videoBroadcast,
    onicecandidate: onIceCandidate,
  };

  rtcPeer = kurentoUtils.WebRtcPeer.WebRtcPeerRecvonly(options, function (
    err
  ) {
    if (err) {
      return console.error(err);
    }
    this.generateOffer(onOffer);
  });

  var onOffer = function (err, offer, wp) {
    console.log("sending offer");
    var message = {
      event: "processOffer",
      roomName: roomName,
      sdpOffer: offer,
    };
    sendMessage(message);
  };

  function onIceCandidate(candidate, wp) {
    console.log("sending ice candidates");
    var message = {
      event: "candidate",
      roomName: roomName,
      candidate: candidate,
    };
    sendMessage(message);
  }
}
...
On the server side, the processOffer event looks similar for both presenters and viewers.
server.js
function processOffer(socket, roomname, sdpOffer, callback) {
    getEndpointForUser(socket, roomname, (err, endpoint) => {
        if (err) {
            return callback(err);
        }

        endpoint.processOffer(sdpOffer, (err, sdpAnswer) => {
            if (err) {
                return callback(err);
            }

            socket.emit('message', {
                event: 'receiveVideoAnswer',
                sdpAnswer: sdpAnswer
            });

            endpoint.gatherCandidates(err => {
                if (err) {
                    return callback(err);
                }
            });
        });
    })
}
Finally, the client receives the answer and processes it. Don’t forget about the ice candidates exchange, which is happening simultaneously.
public/client.js
function onReceiveVideoAnswer(sdpAnswer) {
  rtcPeer.processAnswer(sdpAnswer);
}

function addIceCandidate(candidate) {
  rtcPeer.addIceCandidate(candidate);
}
server.js
...
case 'candidate':
                addIceCandidate(socket, message.userid, message.roomName, message.candidate, err => {
                    if (err) {
                        console.log(err);
                    }
                });
                break;
...
function addIceCandidate(socket, senderid, roomname, iceCandidate, callback) {
    const myRoom = io.sockets.adapter.rooms[roomname]
    let user = myRoom.participants[socket.id] ||  myRoom.presenter;
    if (user != null) {
        let candidate = kurento.register.complexTypes.IceCandidate(iceCandidate);
        user.endpoint.addIceCandidate(candidate);
        callback(null);
    } else {
        callback(new Error("addIceCandidate failed"));
    }
}
...
Now, let’s see our application running. Open a terminal and navigate to the application folder. Then run:
npm install && npm startOn another terminal window, run ngrok to make this application available to the internet. If you don’t have ngrok installed, you can get it here.
ngrok http 3000Using the https address provided by ngrok, open the application on multiple devices. Log in as presenter first, then as viewer.

Conclusion
A media server makes broadcasting easier by eliminating the need for the presenter to maintain multiple peer connections. However, this adds a layer of complexity over application maintenance because now it’s required to also take care of the server. In the next post in this series, we’ll take a look at implementing broadcasting using a Communications Platform as a Service (CPaas). Stay tuned!


