In the first post of this series, Building Hybrid WebRTC Experiences: Combining the Best of Online and In-Person Interaction, my colleague Hector Zelaya showed that creating a WebRTC application that combines a remote and an in-person experience is not only more and more necessary, but also not as straightforward as it sounds. A successful hybrid approach is not only a matter of changing from where we work or study. It is also changing the tools, and how we use them. The goal is to have the best of both worlds.
The trick to doing this correctly is to take into account the work flows that were proven successful in remote approaches and combine them with on-site practices in a way that each accommodates the other. In this post, we’ll explore how to build such an experience, using an online education tool as our example.
WebRTC and Remote Capabilities
WebRTC uses a dual approach to achieve this.
- It facilitates the establishment of audio/video communication between all the participants
- WebRTC’s DataChannel API enables the exchange of arbitrary data, supporting advanced features such as chat, virtual boards or anything that implies real-time information sync
There are different ways to implement WebRTC capabilities into a web application:
- Directly using the APIs available in the browsers and establishing peer-to-peer connections by hand
- Leveraging open source media servers
- Through the services of a Communication-Platform-as-a-Service (CPaaS) provider
For simplicity, in this example we will use the Vonage Video API from our partner and popular CPaaS Provider, Vonage. The code examples use Next.js and rely on GraphQL subscriptions for updates in real time and Recoil state management to store these in the client side. However, the same concepts can be applied to web development in general and pubsub mechanisms such as WebSockets.
Step One: Add remote capabilities by setting up Vonage Video API in Next.js
Let’s see how to start adding remote capabilities to our application using Vonage Video API. First, in our backend we need to install the OpenTok package. Then we need to add a way to create new sessions. For this, we use GraphQL to define a mutation as the one below.
In the mutation, we update the model object with the newly created session ID and a status, and we notify the frontend that the session has started. A simple pubsub mechanism can be used for this, but we won’t cover it as part of this blog post as it’s out of the scope of it.
// GraphQL mutation for creating a session
startClass: async (_, { id }) => {
  // initialize Opentok with credentials
  // for security, credentials should be loaded dynamically
  // i.e. using environment variables
  const opentok = new OpenTok(
    process.env.VONAGE_API_KEY,
    process.env.VONAGE_API_SECRET
  );

  try {
    return new Promise((resolve, reject) => {
      // create the session
      opentok.createSession({ mediaMode: "routed" }, (err, session) => {
        if (err) {
          return reject(err);
        }
        // if everything goes well then we update the session's model object
        // this will save the session information in the database
        Class.update(
          {
            vonage_session: session?.sessionId,
            status: "in_progress",
          },
          { where: { id: id }, returning: true, plain: true }
        ).then((response) => {
          // after creating the session we notify the frontend
          pubSub.publish("classStarted");
          return resolve(response[1].dataValues);
        });
      });
    });
  } catch (err) {
    throw new GraphQLError(err);
  }
};
Next, in the frontend, we need to initialize the session so students and teachers can connect. To do so we leverage the getServerSideProps function from Next.js to set up the required values in the server prior to page rendering. There, we query the session from the backend, initialize the OpenTok’s client library and generate a token for the user to join the call. Finally, we pass the session ID and token to the page as props.
export const getServerSideProps: GetServerSideProps = async ({
  params,
  req,
}) => {
  ...
  // same as the backend we get credentials from
  // server-side environment variables
  const apiKey = process.env.VONAGE_API_KEY!;
  const apiSecret = process.env.VONAGE_API_SECRET!;
  ...

  // we query the backend to get the session.
  // In this example we use assume there is a GraphQL query
  // that performs a search in the database
  const { data } = await client.query({
    query: GetClassBySlugWithUserDocument,
    variables: { // the query params },
  });

  ...

  // we obtain the data from query results including session data
  const { getClassBySlug: thisClass, ... } = data;

  // we initialize client side Opentok library
  const otClient = new OpenTok(apiKey, apiSecret);
  let sessionToken = null;
  let sessionId = thisClass?.vonage_session || null;

  ...

  // we generate a token for the user to join the session
  if (sessionId && otClient) {
    sessionToken = await otClient.generateToken(sessionId, {
      expireTime: new Date().getTime() / 1000 + 6 * 60 * 60,
      role: "moderator",
      data: JSON.stringify(viewer),
    });
  }

  // we pass the session information as props to the page
  return {
    props: {
      sessionToken,
      sessionId,
      thisClass: data?.getClassBySlug,
      ...
    },
  };
};
Now from client-side code you can use this data to join sessions. A good way to have this information available across the application is to implement a state management tool such as Recoil. Then it’s just matter of init and connect a session as shown below:
const session = Opentok.initSession(process.env.VONAGE_API_KEY, sessionId);Step Two: “Teacher, Can I Go to The Bathroom?”
When all teachers and students are in the same classroom, students that want to ask a question or make a comment can raise their hand for the teacher to grant them permission to talk. This is based on the ability of the teacher to see students.
Even when student video streams are available, it’s difficult to keep track of this in a remote approach. It is important to implement a mechanism to make hand raising more explicit. Specific UI elements must be highlighted or make a sound when a student “raises” his/her hand.
The first step to implement this is to store the “status” of the remote student, which includes things such as his/her location and a flag for raising hand. Then, on the client side we need to “react” to any change in such a status.
For this we use GraphQL subscriptions and store the value in the Recoil state. Below is an example of this that uses the Apollo Client library to execute subscriptions.
...
// return a setter variable to write into the state
const setUserStatusOnline = useSetRecoilState(userStatusAtom);

// execute a previously defined GraphQL subscription
// that listens for changes in student status
useSubscription(MY_CLASS_USER_STATUS, {
  ...
  // on receiving data
  onData: ({ data: subscriptionData }) => {
    const { data } = subscriptionData;

    // get student's data
    const {
      status,
      location,
      role,
      handRaised,
      userMode,
      isMobile,
      ... // more properties
    } = data?.getMyClassUserStatus ?? {};

    // store data in the state
    setUserStatusOnline({
      status,
      location,
      role,
      handRaised,
      userMode,
      isMobile,
      ...
    });
  },
});
In addition to listening for changes we also need to trigger such changes. To do so, we create a toggle function that will mutate the status of raising a hand, hence making the subscription hear this change.
const toggle = (userId: null, raised) => {
  upsertClassUser({
    variables: {
      input: {
        userId: userId || viewer?.id,
        handRaised: raised,
        classSlug: slug as string,
      },
    },
  });
}
Then, we create a Recoil selector to determine whether the student is raising his/her hand. Next, we use that selector to conditionally render UI elements.
// We have a recoil selector that will trigger hand raised change
export const handRaisedSelector = selector({
  key: "handRaisedSelectorKey",
  get: ({ get }) => {
    const userStatusOnline = get(userStatusAtom);
    return userStatusOnline.handRaised;
  },
  cachePolicy_UNSTABLE: {
    eviction: "most-recent",
  },
});

...

// And the HandRaisedButton that reflects the change
const HandRaisedButton = () => {
  const handRaised = useRecoilValue(handRaisedSelector);
  const { toggle } = useToggleHandRaised();
  return (
    <StyledDeviceButton
      onClick={() => toggle(null, !handRaised)}
      name="hand-button"
    >
      <HandIcon
        color={handRaised ? "black" : "white"}
        width="25px"
        height="25px"
      />
    </StyledDeviceButton>
  );
};
Step Three: Adapting for a Hybrid Experience
As stated before, embracing a hybrid approach requires combining the best aspects of both remote and on-site experiences. We bring the virtual tools into the on-site classroom, but with some important adjustments. This enables organizations to create a versatile and dynamic environment, accommodating to different scenarios and optimizing productivity and collaboration.
In our tele-education example, a successful hybrid approach keeps the core functionality of the application common for both on-site and remote students. We only change the communication method.
So far, the application has been optimized for remote approach by providing video conferencing and “raise hand” capabilities. Now, we want to:
- Implement features like shared whiteboard/notebooks for both types of students. (Remember, “keep the core functionality of the application common for both types of users”.)
This is a perfect fit for WebRTC’s DataChannel API real-time sync capabilities. A complete walkthrough of such an API is out of the scope of this post, but you can see it in action in our post How to Create a Multiplayer Tic-Tac-Toe Game Using WebRTC. - Remove the video conferencing-related user interface elements for on-site students since they can directly talk with teachers without it. Students that are on-site will use a stripped down version of the application that doesn’t include video/audio conferencing-related UI elements.
- Adapt the physical space to give remote students the same relevance as on-site ones.
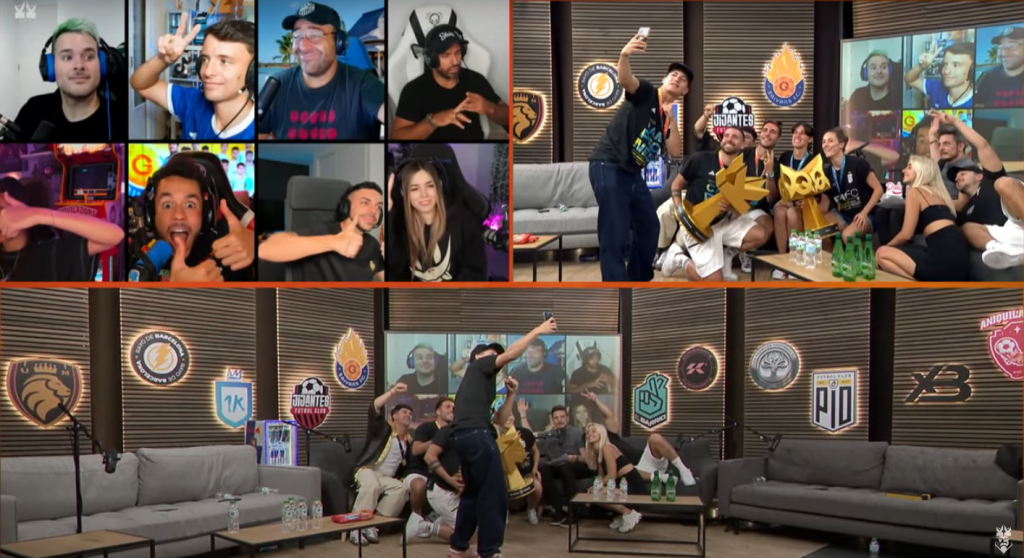
The latter is an aspect that it’s often forgotten when adopting hybrid approaches. In our post WebRTC & Real-Time Communications in The Wild: The Kings League, we explained how they achieve remote and on-site collaboration through something as simple as adding screens that give visibility to team presidents that are not physically present in the matches and discussions about the league.
Getting back to our tele-education application … given the component-based approach of Next.js applications, all the elements of a web page can be built as reusable “components”. This allows you to build multiple pages with them without having to rewrite common UI elements.
Thanks to this, it’s fairly simple to build separate session pages for on-site and remote students, only including what’s needed for each one.
To change between the session page and waiting lobby for remote students, and “hybrid” session page for those on-site, we have a location manager that listens to the user status, including location and mode.
// Recoil selectors that determine values of student status
const userLocation = useRecoilValue(locationSelector);
const isHybrid = useRecoilValue(hybridSelector);
... // more selectors

useEffect(() => {
  ...

  // determine if a users is joining on-site (hybrid) or remotely
  const newUserMode = userLocation === "class" && isHybrid ? "/hybrid" : "";

  // build the url of a class identified by a slug
  // when joining remotely, put the student in a waiting room (lobby)
  const newRoute = `/class/${slug}${
    userLocation === "class" ? "" : "/lobby"
  }${newUserMode}`;

  // move the student to the proper page
  if (newRoute !== router.asPath) {
    if (userLocation === "class") {
      CookieService.set("granted_access", slug as string, {
        path: "/",
        expires: new Date(Date.now() + 7200000),
      });
    }
    window.location.href = newRoute;
  }
}, [isHybrid, router.asPath, slug, userLocation, userRoleSelector]);
And there you have it!
By leveraging the power of Vonage Video API, combined with the Next.js framework for a component-based view design, GraphQL subscriptions for listening for changes in real-time, and Recoil state management for storing these locally, we optimized an EdTech Application to connect remote students with teachers. We also adapted it for students on-site, in a way that both can get a similar experience.
Hybrid approaches can combine the social benefits of on-site with the flexibility of remote approaches and is a convenient alternative for many industries, such as education and healthcare. However, it’s also important to shape the work flows correctly, including the physical spaces and software tools that support such approaches.
If you’re interested in implementing a hybrid approach for your organization and need help adapting your WebRTC application to it, we have the expertise you need! Contact us to know more about our services. Let’s make it live!