
In How to Create Web-based Multiplayer Games with WebRTC, we described the process of creating a multiplayer video game using WebRTC. Today we are going to put such a process into practice to create our very own Tic-Tac-Toe game powered by WebRTC.
To keep things simple, we will focus on showing how to use WebRTC for building your game, including things such as the configuration of the game server and managing connections from the client. But other aspects, more related with a production-like setup, such as scaling, authentication and encryption will be left behind.
Such settings are a topic on their own and will be covered in future posts.
Requirements and Stack
The code of the game is written in JavaScript. We will use the web framework React, which will allow us to split the logic of the game into different components with their own state. The code is available on Github. If you want to follow along, there is a branch where you can practice what you’ll learn here.
To begin with, start by cloning the repo. You’ll need git installed on your computer to do so. Open a terminal application, navigate to where you’d like to download the code and run the following command:
git clone https://github.com/WebRTCventures/webrtc-tic-tac-toe && cd webrtc-tic-tac-toeIf you want to follow along, switch to the code-along branch by running the following command in the same terminal window:
git checkout code-alongFor running the application, you’ll need Node 16. For the game server, we will use Docker and Docker Compose. Take a look at the installation instructions for each of these and come back when you’re ready.
Creating the Game
If you recall from the previous post, we listed out the things to have in mind when creating your multiplayer game. Today, we will build our tic tac toe game on top of these.
1. Set Up Your Infrastructure
WebRTC requires a set of servers to achieve NAT traversal and allow the connecting peers to connect to each other. These are the STUN/TURN servers and the Signaling server.
For this exercise we will use Google’s free STUN server. Since the game will run locally, we won’t need TURN (for now). We will add Signaling as part of our game server, which for this case will be open source Janus WebRTC Server. More on this in the next topic.
2. Provision Your Game Server
As mentioned above, instead of writing a game server from scratch – and having to include WebRTC core functionality – we will rely on an ready-to-use open source solution, the Janus WebRTC Server.
In the provided base repo you’ll find a folder named janus in the root directory. This folder contains the configuration of our game server as well as the Docker image and the Docker-compose definitions for it.
Most of the configuration files come “as-is” from the official Janus Github repositories. Let’s take a look at some of the most important settings applied for this project.
One of these files is the janus.jcfg file. This file contains the core configuration of the Janus media server. For this exercise we have set the location of the configuration files inside the Docker container and the NAT configuration, where we set which STUN server to use. Since we’re not using TURN, such configuration is commented-out for now.
# janus/conf/janus.jcfg
…
# changing these to what we will set in Docker Compose definition
configs_folder = "/opt/janus/etc/janus"               # Configuration files folder
plugins_folder = "/opt/janus/lib/janus/plugins"       # Plugins folder
transports_folder = "/opt/janus/lib/janus/transports" # Transports folder
events_folder = "/opt/janus/lib/janus/events"         # Event handlers folder
loggers_folder = "/opt/janus/lib/janus/loggers"       # External loggers folder
…
nat: {
	# Using Google’s STUN server
       stun_server = "stun.l.google.com"
	stun_port = 19302
	nice_debug = false
	full_trickle = true
…
      # leaving this commented since we’re running locally
      # nat_1_1_mapping = "1.2.3.4"
…
      # no turn this time so these are commented
      #turn_server = "myturnserver.com"
      #turn_port = 3478
      #turn_type = "udp"
      #turn_user = "myuser"
      #turn_pwd = "mypassword"
…
Next configuration file is the janus.plugin.textroom.jcfg file which is the configuration file for the TextRoom Janus plugin. This is the plugin that we will use to enable the data channels that will keep the game state in sync.
In this file we can set general settings for data channels and we can also create permanent data channels if we want. For now, we will keep default settings.
The last but not least configuration file for today’s topic is the janus.transport.http.jcfg file. This file is where we configure the connection parameters between the browser and the game server. For this exercise we are setting up a basic REST API connection exposed at /janus base path.
# janus/conf/janus.transport.http.jcfg
…
general: {
  # expose the API at /janus
  base_path = "/janus" # Base path to bind to in the web server (plain HTTP only)
  http = true		   # Whether to enable the plain HTTP interface
  port = 8088          # Web server HTTP port
  …
  # No https for now
  https = false	   # Whether to enable HTTPS (default=false)
  …
}
…
Dockerfile and docker-compose.yml files provide a convenient way to run this game server locally using Docker.
To start your game server, open a terminal app, navigate to the janus directory and run the following command:
docker-compose upWait a couple of minutes while Docker downloads dependencies and builds the Janus image. After that our game server will be running and listening for connection requests on port 8088.
To test that everything is working as expected, open a web browser and navigate to http://localhost:8088/janus/info. You’ll see something like this:
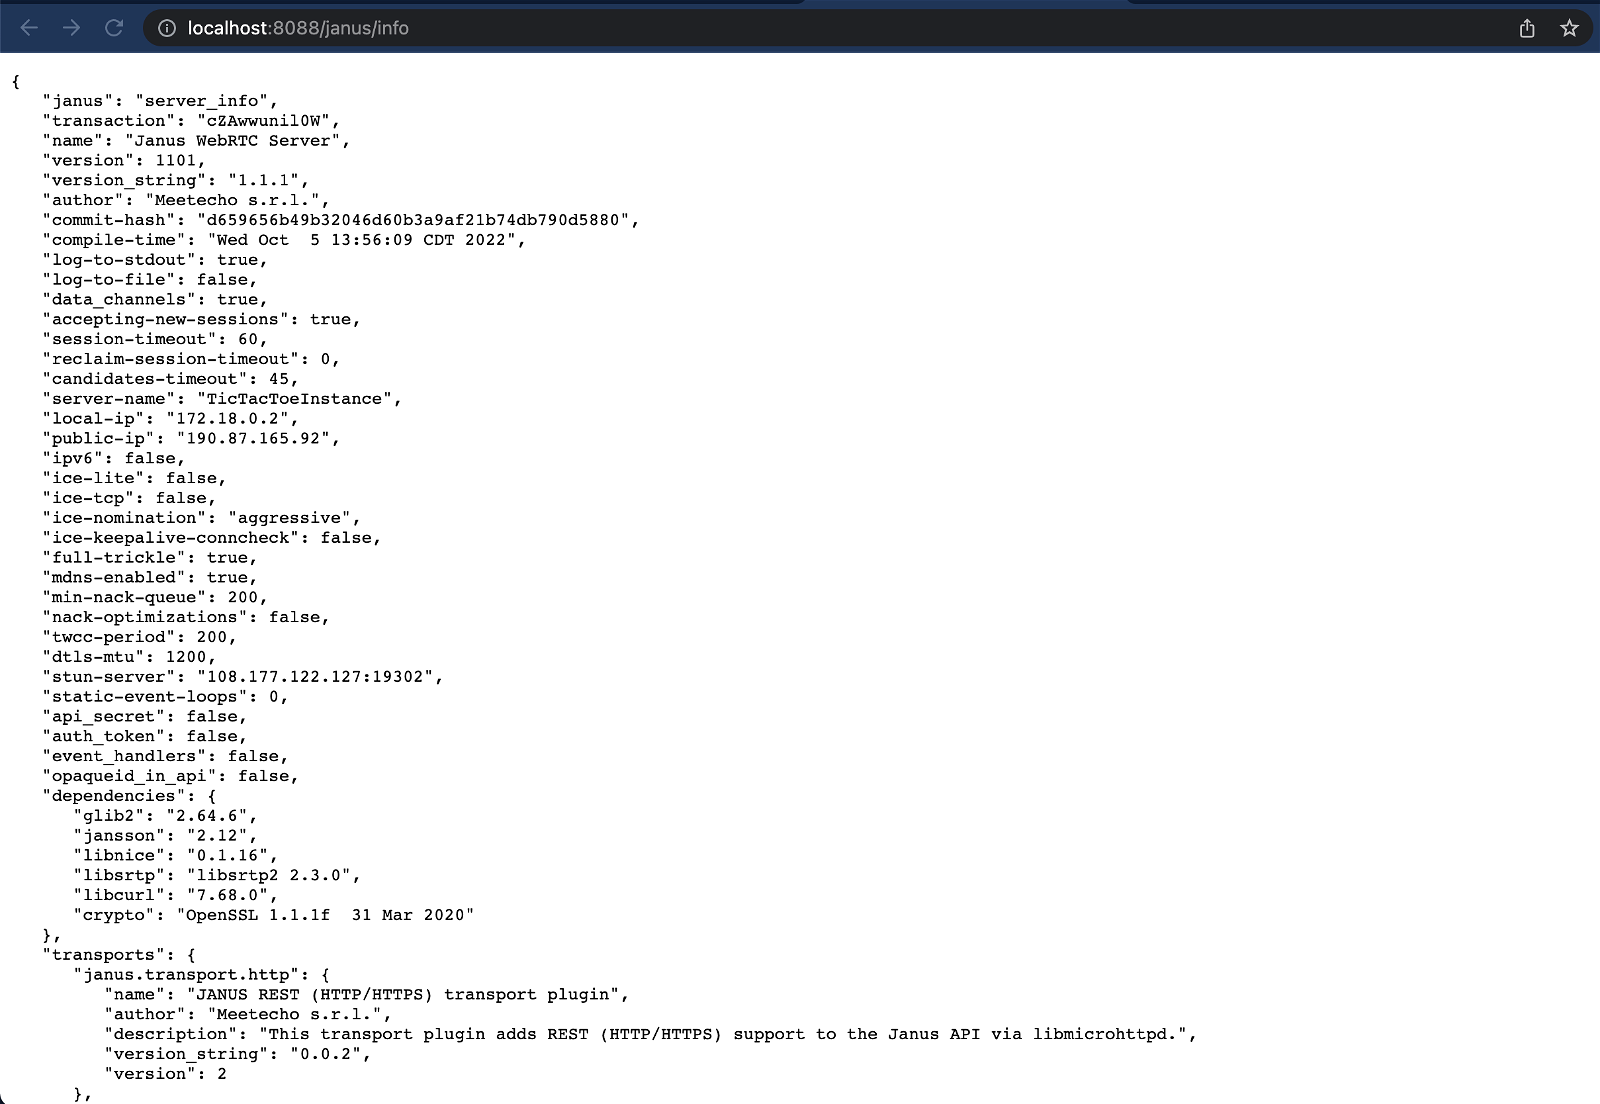
And just like that we have our game server ready! Now comes the fun part: building the actual game!
3. Write Your Game
The logic of our Tic-Tac-Toe game is based on an excellent tic-tac-toe game tutorial on YouTube, but using WebRTC under the hood instead and removing some features that are not essential for our purposes.
To begin with, let’s add a way for players to identify themselves and join a game.
Joining a Game
The first thing we need is a form where the player can specify a “game room” for the game to take place. Players also need to identify themselves when joining a game, so the form needs an additional input field to enter a username.
This information needs to be stored somewhere, so we will leverage React’s state functionality to keep track of it. In addition to this, we need to add some logic to tell when a user is in a game, this also will be kept in React’s state.
If you’re coding along, make sure you add the related code to the files as shown below:
// src/App.js
…
function App() {
  // State to keep track of the room, username and whether the user
  // is within a game or not
  const [inGame, setInGame] = useState(false);
  const [room, setRoom] = useState('')
  const [username, setUsername] = useState('')

  // A function to handle when the player wants to join a game
  const handleJoinGame = () => {
    if (room && username) setInGame(true);
  }

  return (
    <>
      {inGame ? ( // The user is within a game
        <div> Welcome, player!</div>
      ) : (       // The user is not within a game
        <>
          <input
             type='text'
             placeholder='Enter Room Number'
             value={room}
             onChange={(evt) => setRoom(evt.target.value)} />
          <input
             type='text'
             placeholder="Enter Username"
             value={username} onChange={(evt) => setUsername(evt.target.value)} />
          <button onClick={handleJoinGame}>Join Call</button>
        </>
      )}
    </>
  );
}
…
Connecting to Game Server
Before getting into the details of the game, let’s take a moment to set up the connection between the browser and the game server.
The base repo already provides some boilerplate under vendor/react-janus that takes care of the heavy lifting of the connection for you. Let’s review this logic.
Connecting to a Janus server is a process that mainly consists on three steps:
- Create a session
- Attach a plugin to the session
- Interact with the plugin
All these steps can be performed by making requests to the HTTP REST API that we configured before. But to make things easier, the team behind Janus provides a Javascript API that we can add to our projects and use.
This library is already in the repo and just a couple of changes have been made to make it work with our game.
// src/vendor/react-janus/utils/janus.js
// Just to make the create-react-app server happy
/* eslint-disable strict */
/* eslint-disable no-throw-literal */
/* eslint-disable eqeqeq */
…
// The Javascript library rely on these to be defined as global variables
import adapter from 'webrtc-adapter';
import jQuery from 'jquery';
…
function Janus(gatewayCallbacks) {
…
}
// Makes the Janus object available to be imported on React components
export default Janus;
This official library exposes a Janus object that, after being initialized, can be used to create the session and attach any desired plugin.
To make the initialization easy you can use the provided JanusComponent file, which already provides the required code in a convenient React component.
// src/vendor/react-janus/JanusComponent.js
…
// import the Janus object from the official library
import Janus from './utils/janus';

const JanusComponent = (//properties …) => {

  // store the janus element in a reference and define a state for the session
  const janusEl = useRef(null);
  const [janusInstance, setJanusInstance] = useState(null);

  // When the component renders, initialize the library
  useEffect(() => {
    Janus.init({ debug: "all", callback: function() {
      …
      // After initializing the library, create the session
      const janus = new Janus(
        {
          server,     // set the server address
          iceServers, // set the STUN/TURN servers
          success: function() {
            setJanusInstance(janus) // store the session in the state
          }
          // more callbacks
          …
        }
      );
    }})
  }, []);

  // render children components clones passing the janusInstance as prop
  return (
   <div className="janus-container" ref={janusEl}>
     {children &&
       children.length &&
         children.map((child, i) => (
           React.cloneElement(child, { janus: janusInstance, key: i })
         ))
     }
     {children &&
       !children.length &&
         React.cloneElement(children, { janus: janusInstance })
     }
   </div>
  );
}

export default JanusComponent;
The JanusComponent allows its child components to access the Janus session instance as a property.
Another useful file is the chatroom.js file. This file provides useful functions for attaching the TextRoom Janus plugin to the session, sending messages to a channel and leaving the game.
// src/vendor/react-janus/utils/chatroom.js
let chatroomHandler;

export function publishChatroom(//properties …){
  …
  // attach the textroom plugin to the session
  janus.attach({
    plugin: 'janus.plugin.textroom',
    // more properties and callbacks to interact with the plugin:
    // i.e.
    //   create or join a chat room
    //   perform signaling
    //   receive game state updates
  });
}
…
export function sendData(chatroom, data, event = 'message') {
  …
  // send data to the channel
  chatroomHandler.data({
    text: JSON.stringify(message),
    error: function (reason) { },
    success: function () { },
  });
}

export function leaveRoom(chatroom) {
  …
  // send the request to leave the channel
  chatroomHandler.data({
    text: JSON.stringify(message),
    error: function (reason) { },
    success: function () { },
  });
}
With all these pieces in place, all we need to do to connect to Janus is to add the JanusComponent to App.js.
// src/App.js
…
return (
    <>
      {inGame ? ( // The user is within a game
        <JanusComponent
          server="/janus"
          iceUrls='stun:stun.l.google.com:19302'>
            <Game room={parseInt(room)}
                username={username}
                setInGame={setInGame}/>
        </JanusComponent>
      ) : (       // The user is not within a game
        <>
          <input
             type='text'
             placeholder='Enter Room Number'
             value={room} onChange={(evt) => setRoom(evt.target.value)} />
          <input
             type='text'
             placeholder="Enter Username"
             value={username}
             onChange={(evt) => setUsername(evt.target.value)} />
          <button onClick={handleJoinGame}>Join Call</button>
        </>
      )}
    </>
  );
…
Note the two attributes passed to JanusComponent: server and iceUrls. These attributes tell the underlying library where to find the Janus server and the STUN/TURN server to use, respectively.
Also note the use of the Game component, but before delving into the details of it, let’s take a moment to show how the game server address can be as simply as ‘/janus’.
If you open package.json you’ll see a proxy property that is set to the Janus server. This property tells the React server to route any unknown route to there.
{
  …
  "proxy": "http://127.0.0.1:8088"
  …
}
Having that covered, we can now focus on adding our game logic to the Game component.
Setting Up Our Game
Initially, we want to define some state to store things like player information, whose turn it is and the state of the board. In other words, the game state itself.
Next, we need to define a callback function that will handle messages from the game server. This function will be passed as a parameter when attaching to the TextRoom plugin.
And finally, based on the number of players we want to show a sort of “waiting room” for the first player to join, and then after another player joins, render the Tic Tac Toe board. In addition to that, we want to show a “full room” message when a third player tries to join.
// src/components/Game.js
…
// adding the props from JanusComponent and App.js
function Game({ janus, room, username, setInGame }) {
// define the game state
const [rivals, setRivals] = useState(0);
const [result, setResult] = useState({ winner: 'none', state: 'none' });
const [board, setBoard] = useState(["", "", "", "", "", "", "", "", ""]);
const [player, setPlayer] = useState('X');
const [turn, setTurn] = useState('X');
// create state ref to keep its value in the callback updated
const rivalsRef = useRef();
rivalsRef.current = rivals;
// create the callback
const janusCallback = (handle, event, data) => {
switch (event) {
case 'success':
// if joining a room is successful, check participants
if (data.participants) setRivals(data.participants.length);
break;
case 'join':
// listen for other players joining
// don’t add more players if there is already a rival!
if (username !== data.username && rivalsRef.current < 1) {
setRivals(prevState => prevState + 1);
}
break;
case 'message':
// listen game events from other players
if (username !== data.from) {
const {square : rivalSquare, player : rivalPlayer} = JSON.parse(data.text);
const currentPlayer = rivalPlayer === 'X' ? 'O' : 'X';
setPlayer(currentPlayer);
setTurn(currentPlayer);
setBoard(prevState => prevState.map((val, index) => {
if (index === rivalSquare && val === '') {
return rivalPlayer
}
return val;
}))
};
break;
default:
break;
}
}
// create/join room when obtaining a janus session
// see chatroom.js for more info about the parameters
useEffect(() => {
textUtils.publishChatroom(
janus,
'textroom-' + username,
true,
room,
username,
username,
janusCallback
)
// eslint-disable-next-line react-hooks/exhaustive-deps
}, [janus]);
// render appropriately based on number of players
return (
<>
{rivals === 0 && (
<p>Waiting for other participants to join</p>
)}
{rivals === 1 && (
<div className='gameContainer'>
<h3>Game {room}</h3>
<p>User: {username}</p>
</div>
)}
{rivals >= 2 && (
<p>This game is full!</p>
)}
</>
)
}
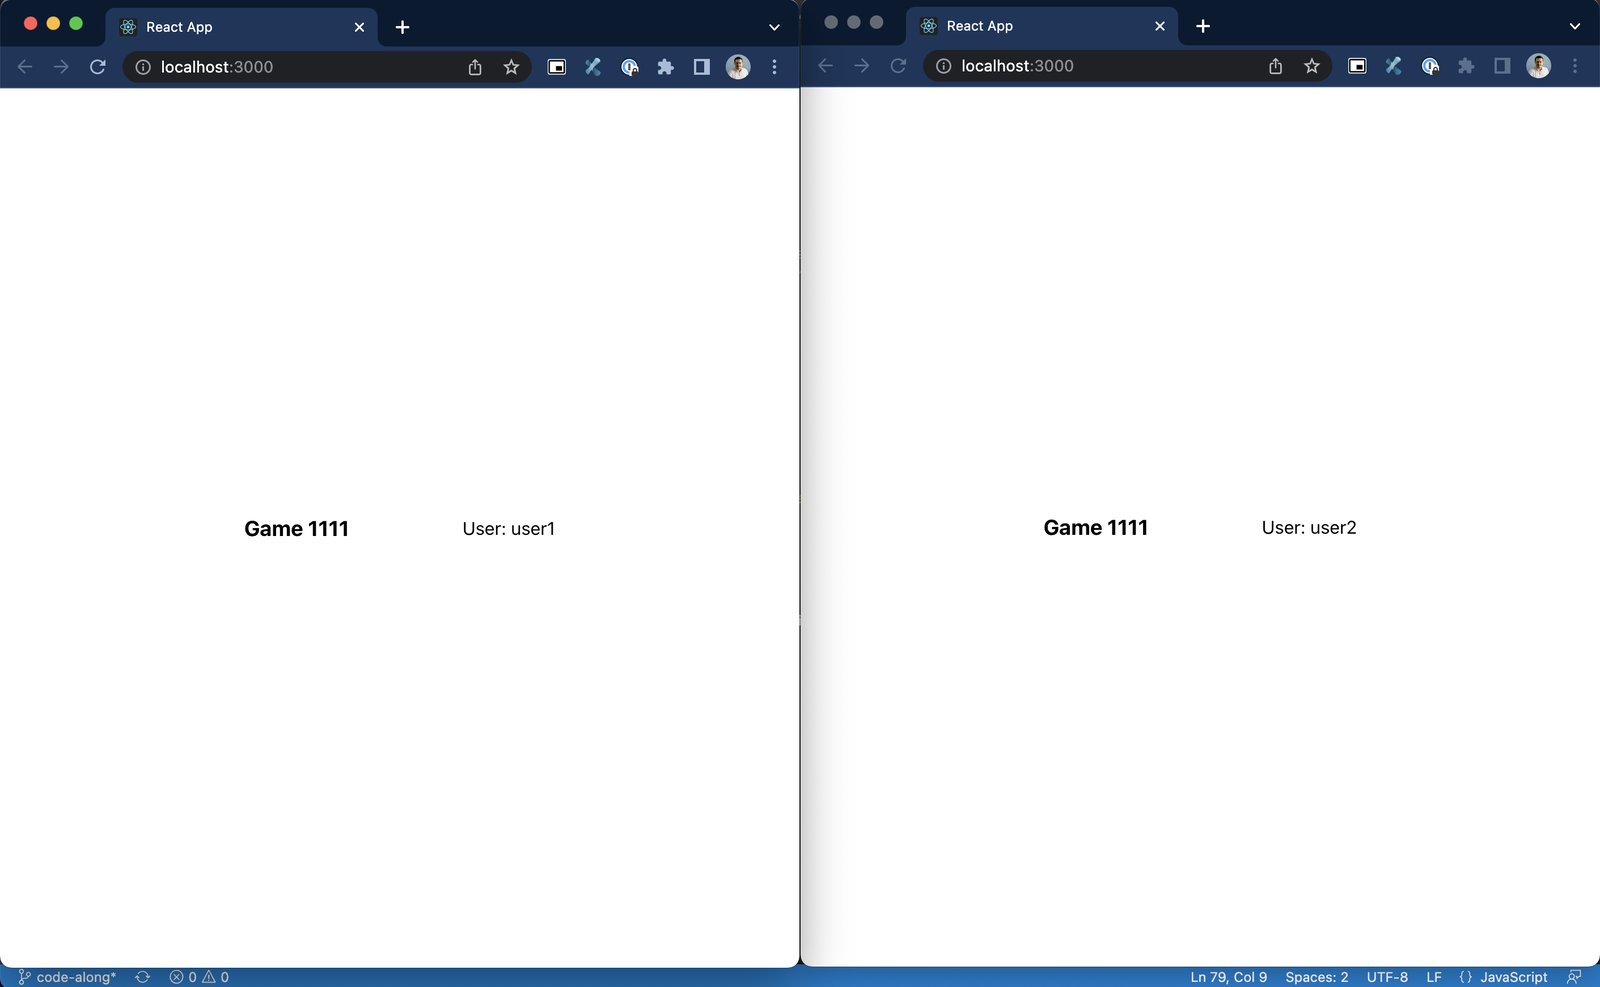
export default Game;Now you can test this by running the application and trying to join to the same room in two different browsers.
To run the application, open a window terminal, navigate to the application folder and run the following command:
npm install && npm startYou should be able to see something like this when joining a room in two different browsers:
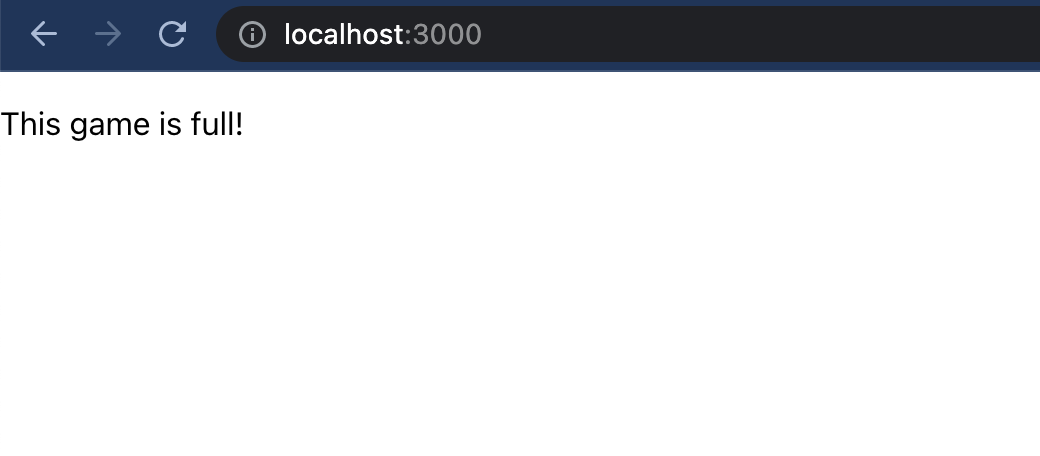
And if a third one tries to join the following is shown:
It’s Time For Some Tic-Tac-Toe!
With the details of the connection in place, it’s time to add the actual logic of the game. This will live in the Board component.
The first thing we need is a set of functions to detect the result of the game, either a victory or a tie, and update the game state accordingly. You’ll want to make this check every time there is a change in the state of the board, so you can make use of React’s useEffect hook.
Finally, we need to keep the board up-to-date and also let the parent component know about any new change.
// src/components/Board.js
…
// add props from Game component
function Board({
  setResult,
  board,
  handleChooseSquare,
}) {
  // check result each time the board changes
  useEffect(() => {
    checkWin();
    checkIfTie();
  }, [board]);

  // helper functions to check if there is a winner or if the game is tied
  const checkWin = () => {
    Patterns.forEach(currPattern => {
      const firstPlayer = board[currPattern[0]];
      if (firstPlayer === "") return;
      let foundWinningPattern = true;

      currPattern.forEach(idx => {
        if (board[idx] !== firstPlayer) {
          foundWinningPattern = false;
        }
      });

      if (foundWinningPattern) {
        // if there is winner change the result
        setResult({winner: board[currPattern[0]], state: "won" })
      }
    });
  }
  const checkIfTie = () => {
    let filled = true;
    board.forEach(square => {
      if (square === '') {
        filled = false;
      }
    });

    if (filled) {
      // if there’s a tie, change result
      setResult({winner: 'none', state: 'tie'});
    }
  }

  // render the board and handle new updates
  return (
    <div className='board'>
      <div className='row'>
        <Square handleChooseSquare={() => handleChooseSquare(0)} val={board[0]} />
        <Square handleChooseSquare={() => handleChooseSquare(1)} val={board[1]} />
        <Square handleChooseSquare={() => handleChooseSquare(2)} val={board[2]} />
      </div>
      <div className='row'>
        <Square handleChooseSquare={() => handleChooseSquare(3)} val={board[3]} />
        <Square handleChooseSquare={() => handleChooseSquare(4)} val={board[4]} />
        <Square handleChooseSquare={() => handleChooseSquare(5)} val={board[5]} />
      </div>
      <div className='row'>
        <Square handleChooseSquare={() => handleChooseSquare(6)} val={board[6]} />
        <Square handleChooseSquare={() => handleChooseSquare(7)} val={board[7]} />
        <Square handleChooseSquare={() => handleChooseSquare(8)} val={board[8]} />
      </div>
    </div>
  )

}

export default Board;
Now let’s add our new component to the Game. We will also define the handleChooseSquare function and show the result of the game.
// src/components/Game.js
…
function Game({ janus, room, username, setInGame }) {
  …
  // create the function for choosing a square
  const chooseSquare = async (square) => {
    // only allow choosing when it’s my turn and the square is empty
    if (turn === player && board[square] === '') {
      // set the other player’s turn
      setTurn(player === 'X' ? 'O' : 'X');

      // send update to game server
      textUtils.sendData(
        room,
        JSON.stringify({square, player}),
        'message'
      )

      // update the local board
      setBoard(prevState => prevState.map((val, index) => {
        if (index === square && val === '') {
          return player
        }
        return val;
      }));
    }
  }

  // Show a message when there is a result
  return (
    …
    {rivals === 1 && (
      …
        <h3>Game {room}</h3>
        <p>User: {username}</p>
        <Board
          setResult={setResult}
          board={board}
          handleChooseSquare={chooseSquare}
        />
        {result.state === 'won' && <div>{result.winner} won the game</div>}
        {result.state === 'tie' && <div>Game Tied</div>}
      </div>
    )}
 …
And that’s pretty much for this Tic-Tac-Toe game. Before trying it out, let’s add a way for players to leave a game when it’s done. To do this, let’s make sure that when unmounting the Game component, we tell the game server that we want to leave the room.
While we’re at it, let’s also add a “Leave Game” button that will simply set the inGame state to false and let the useEffect hook to do its job.
// src/components/Game.js
…
function Game({ janus, room, username, setInGame }) {
  …
  // make sure that we leave the game room when unmounting the component
  useEffect(() => {
    return () => {
      textUtils.leaveRoom(room);
      // additional setInGame in case unmounting due to anything else
      setInGame(false);
    }
  }, [])

  return (
    …
    {rivals === 1 && (
      …
        <button onClick={() => {
          setInGame(false)
        }}>Leave Game</button>
        {result.state === 'won' && <div>{result.winner} won the game</div>}
        {result.state === 'tie' && <div>Game Tied</div>}
      </div>
    )}
…
If you have the application running, it should automatically take the new changes. If not remember that you start it by navigating to application folder on a terminal window and running:
npm startOpen the game in two different browsers and after winning you should see something like this:

A tied game should look like this:
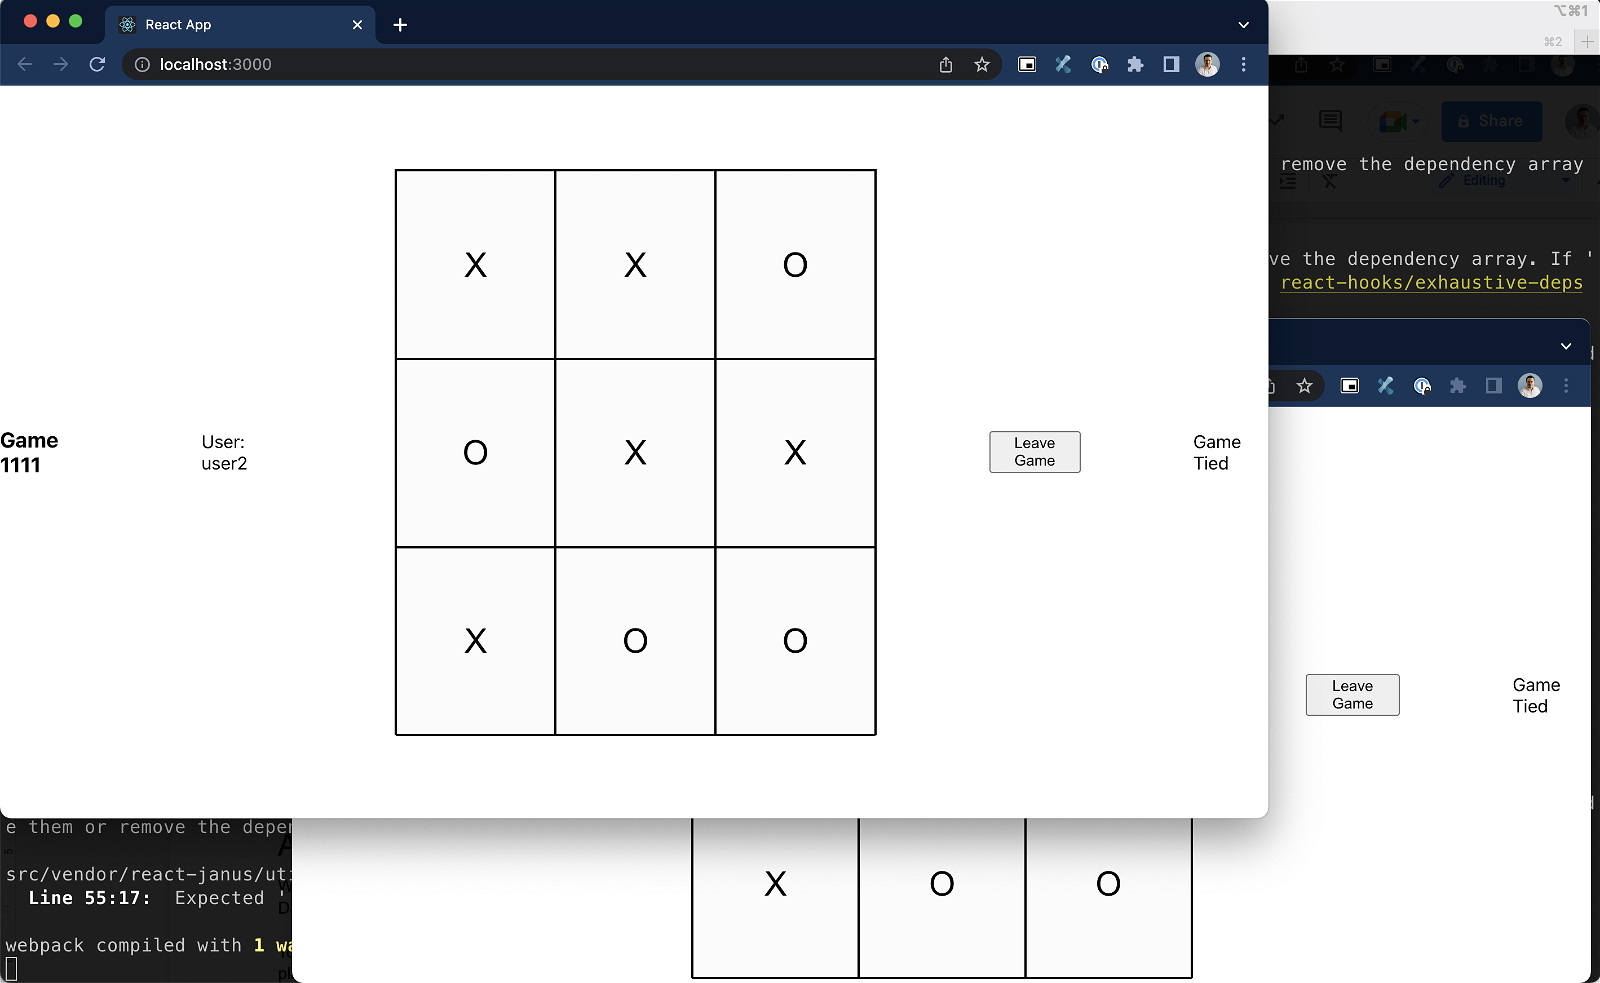
And The Winner is… WebRTC!
With this simple Tic-Tac-Toe game we have seen how simple and effective it is to use DataChannels to build web multiplayer games.
To make things more interesting, wouldn’t it be cool to add video chat to the game so that players can interact with each other just like many other popular multiplayer video games do right now? We can do that taking advantage of the current game server, but this definitely deserves its own blog post so stay tuned for that.
Take advantage of our expertise building high quality real-time applications using WebRTC for your very own idea, existing application or video game by contacting us at http://webrtc.ventures/contact.


