Among the advantages of using the Amazon Chime SDK with serverless architecture is the ability to scale up or down as needed. You only pay for the resources you use, so you can easily increase capacity during peak usage periods and then scale back down when usage decreases. This can save significant amounts of money, especially for businesses that experience fluctuations in usage.
Creating a meeting with the Amazon Chime SDK with serverless architecture is a quick and easy process. In this post, we will review the advantages of both the Amazon Chime SDK and serverless architecture, and then demonstrate setting up a serverless backend for a video conferencing application powered by the Amazon Chime SDK.
Advantages of the Amazon Chime SDK
As you may know, we’re big fans of the Amazon Chime SDK here at WebRTC.ventures. One of the things we love is the ability to customize the meeting experience. Developers can use the Amazon Chime SDK to build their own UI and UX, as well as to add additional features such as recording and transcription. This means that businesses can tailor the meeting experience to their specific needs and requirements.
Security is also a key feature of the Amazon Chime SDK. All data is encrypted in transit and at rest. The service is compliant with a number of industry standards, including SOC 2, HIPAA, and PCI DSS. Additionally, users can control access to their data and communications through the use of permissions and roles.
Why Serverless?
A serverless application in AWS is a combination of Lambda functions, event sources, and other resources that work together to perform tasks. Note that a serverless application is more than just a Lambda function—it can include additional resources such as APIs, databases, and event source mappings.
AWS Lambda has many advantages over traditional architectures, As mentioned above, there are no costs associated with setting up or maintaining a server. This means that you don’t have to worry about scaling your applications since AWS takes care of it for you. It also offers better security because of how it separates the code from the operating system.
Lambda functions also have a tight integration with AWS CloudFormation and Amazon API Gateway, in which you can view your functions as a Backend-as-a-service (BaaS) or put them on a private API. In fact, serverless functions are not only useful for building client applications, but also for building internal applications or other serverless solutions.
You can use the AWS Serverless Application Model (SAM)to define your serverless applications.
You can jump directly into the code here.
Prerequisites
The first step in creating a meeting with Amazon Chime SDK is to set up an AWS account, install the SDK and create an IAM user with appropriate permissions. Once the SDK is installed, developers can use the provided APIs to create and manage meetings, as well as access other features such as voice and video calling, instant messaging, and screen sharing.
- Install AWS Command Line Interface
- Install AWS SAM
- Get permissions to Amazon Chime Administration Console
Let’s get started
Open a terminal and create a folder.
mkdir chime-serverless-meeting
cd chime-serverless-meeting
Initiate node package manager and add the required dependencies.
npm -y init
npm i aws-sdk
npm i uuid
It’s time to build our serverless solution! It will be really simple. You only need to create a handler.js file where we will write the endpoint logic.
touch handler.js
# Or
cat > handler.js
Import dependencies.
// handler.js
const AWS = require('aws-sdk');
const { v4: uuidv4 } = require("uuid");
Initiate the Amazon Chime SDK. Here we are using the us-east-1 region.
const chime = new AWS.Chime({ region: 'us-east-1'});
//Setting the AWS chime endpoint, The global endpoint is
https://service.chime.aws.amazon.com.
chime.endpoint = new AWS.Endpoint('https://service.chime.aws.amazon.com');
Create a start lambda function.
exports.start = async (event, context, callback) => {
    return {
        statusCode : 200,
        headers: { "content-type": "application/json" },
        body: JSON.stringify({}),
    }
};
Creating a new meeting
You can use the Amazon Chime SDK to create a new meeting by simply calling the “createMeeting” function and passing in the necessary parameters, such as the meeting name and the number of attendees.
Here we are fetching all meetings and comparing them with the external meeting id and getting the required meeting info. If the meeting is not available, we will create a new meeting.
 const query = event.queryStringParameters;
   // Retrieve Meetings list
   const meetingsResult = await chime.listMeetings().promise();


   // finding a Meeting with a specific “external id”
   const foundMeeting = Array.from(meetingsResult.Meetings).find(
     (it) => it.ExternalMeetingId === query.room
   );


   // If not, create a new Meeting.
   const createdMeetingResponse =
     !foundMeeting &&
     (await chime
       .createMeeting({
         ClientRequestToken: uuidv4(),
         MediaRegion: "us-west-2",
         ExternalMeetingId: query.room,
       })
       .promise());


   // … or use the found meeting data.
   const meetingResponse = foundMeeting
     ? { Meeting: foundMeeting }
     : createdMeetingResponse;
We need a token for the client to join from the front-end. Here we are creating a token using the creatAttendeee method.
 // Create Attendee info using the existing Meeting info.
   const attendeeResponse = await chime
     .createAttendee({
       MeetingId: meetingResponse.Meeting.MeetingId,
       // Link the attendee to an identity managed by your application.
       ExternalUserId: uuidv4(),
     })
     .promise();
Sending the response:
return {
    statusCode : 200,
    headers: { "content-type": "application/json" },
    body: JSON.stringify({
        attendeeResponse,
        meetingResponse,
    }),
}
Next, create a template.yaml file for lambda function.
touch template.yaml
Or
cat > template.yaml
Here we are using Node.js 12.x version. ConferenceStartFunction is a lambda function for the /start endpoint. We have added policies to access the Amazon Chime SDK to that endpoint.
AWSTemplateFormatVersion: '2010-09-09'
Transform: 'AWS::Serverless-2016-10-31'
Description: Sample serverless Conference with Amazon Chime Demo
Globals:
  Function:
    Runtime: nodejs12.x
    Timeout: 30
    MemorySize: 128
Resources:
  # functions will go here
Outputs:
  ApiURL:
    Description: "API endpoint URL for Prod environment"
    Value: !Sub "https://${ServerlessRestApi}.execute-api.${AWS::Region}.amazonaws.com/Prod/start"
Add lambda function for the start meeting endpoint in Resources.
# Conference start function definition
ConferenceStartFunction:
  Type: AWS::Serverless::Function
  Properties:
    Handler: handlers.start
    Events:
      Api1:
        Type: Api
        Properties:
          Path: /start
          Method: GET
Add access policies for the conference start function in Resources.
# Chime Resources Access Policy
ChimeMeetingsAccessPolicy:
  Type: AWS::IAM::Policy
  Properties:
    PolicyName: ChimeMeetingsAccess
    PolicyDocument:
      Version: "2012-10-17"
      Statement:
        - Effect: Allow
          Action:
            - 'chime:CreateMeeting'
            - 'chime:ListMeetings'
            - 'chime:CreateAttendee'
          Resource: '*'
    Roles:
      # This function role will have this policy
      - Ref: ConferenceStartFunctionRole
Lambda deployment
Now, let’s deploy our solution in the cloud. For that, we are using AWS SAM. The AWS Serverless Application Model (AWS SAM) is an open-source framework that you can use to build serverless applications on AWS.
First, we need to build our code using the below SAM command.
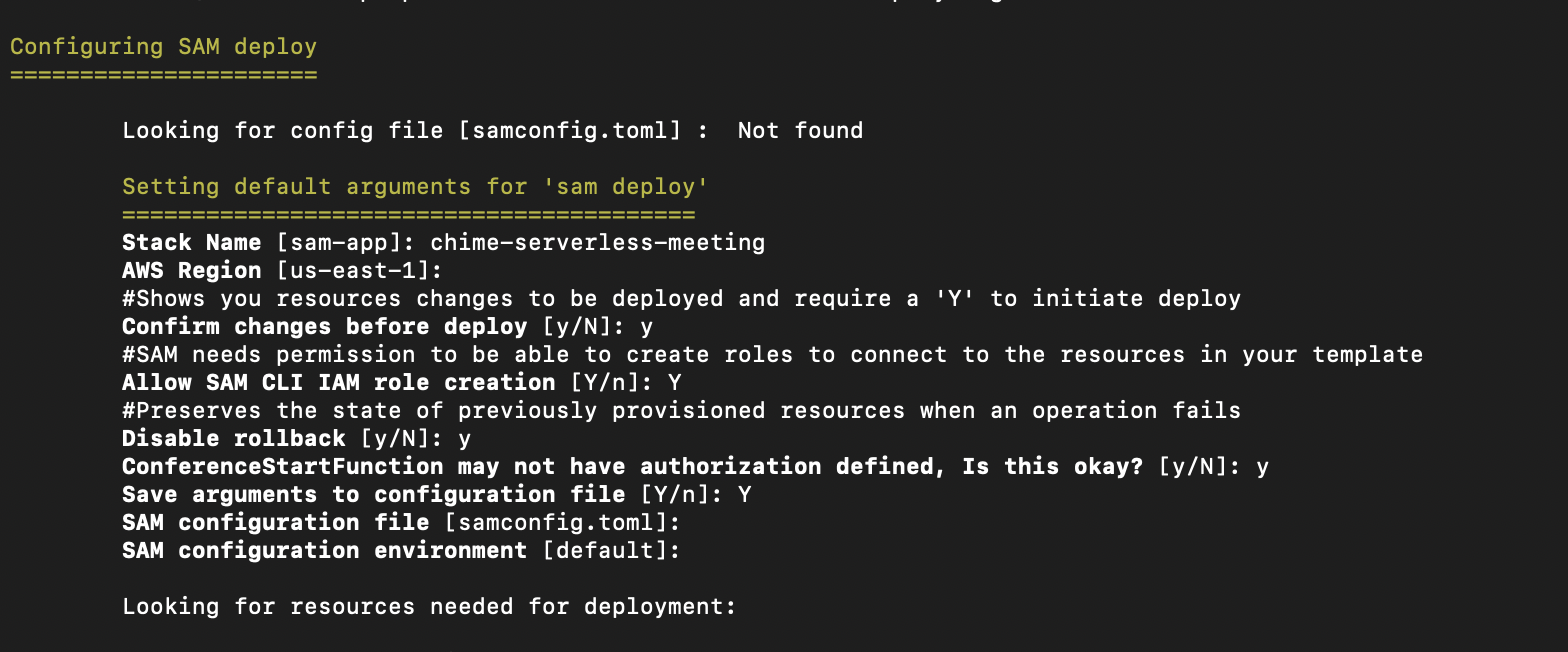
sam buildNext, to deploy we need to execute the below command with a guided parameter. It will help us with deployment options for SAM configuration.
sam deploy --guidedHere it will ask several questions. Please provide your answers. It will deploy your changes in the cloud and create a URL for you to access the endpoints.
Testing the functionality
To preview what we’ve built, we need to use the front-end demo application. Clone the repo here.
git clone <repo name>Install dependencies.
npm iTo avoid the CORS, add a proxy property in the package.json with host URL of the endpoint URL.
"proxy": "https://xyz.in"Change the endpoint URL in the front-end application here with the “/Prod/start” and run the project.
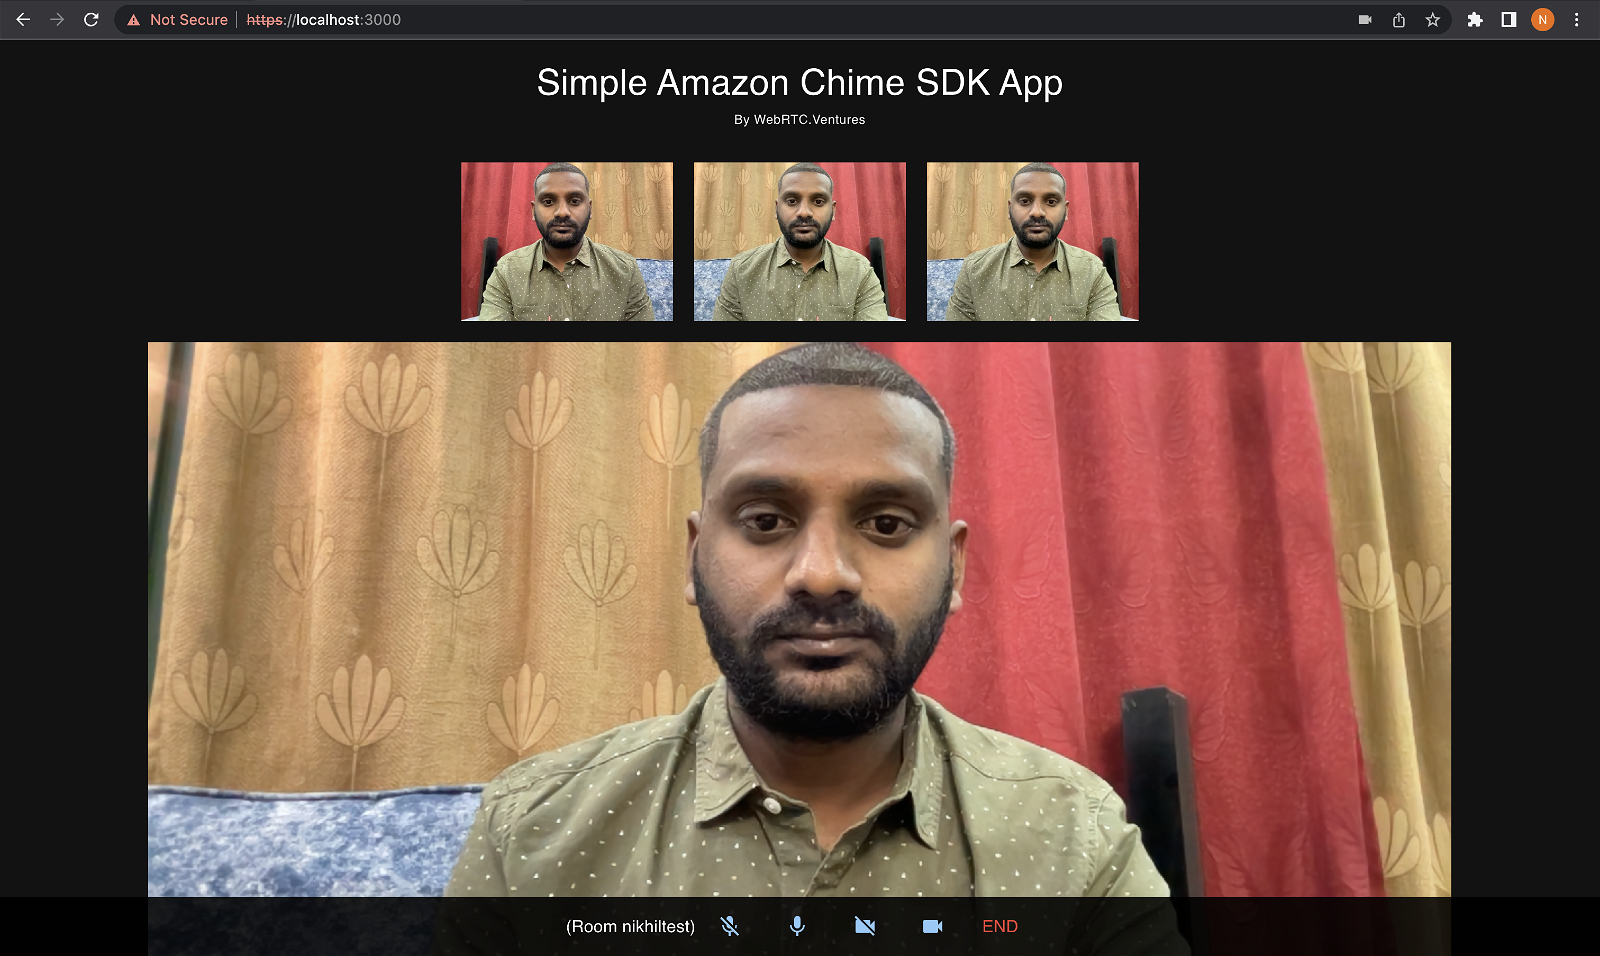
npm startEnter your room name, join multiple users, and here we go!
Conclusion
The Amazon Chime SDK provides a set of APIs that allow easy integration of real-time communications into applications, with features such as voice and video calling, instant messaging, and screen sharing. Customization options, scalability, and security features are also provided. By leveraging the power of the Amazon Chime SDK, developers can easily build applications that allow users to create, join, and manage meetings from anywhere, at any time.
You can also use the Amazon Chime SDK to manage meetings (starting, stopping, or muting the audio), manage attendees (adding or removing them) and access information about the meeting (number of attendees, the duration of the meeting, and more).
Hopefully, you’re already starting to see the power of the Amazon Chime SDK solution. Stay tuned for my next post on creating a SIP media application with the Amazon Chime SDK!
Are you looking for expert design and development help with building your live video application? Our team of experts at WebRTC.ventures have years of experience with Amazon and close relationships with the Amazon Chime SDK team. We would be happy to help you build, deploy, and scale your live video application. We can even offer managed services and hosting around your Amazon Chime SDK application so that you can offload everything about it to our team. Contact us today for more information!