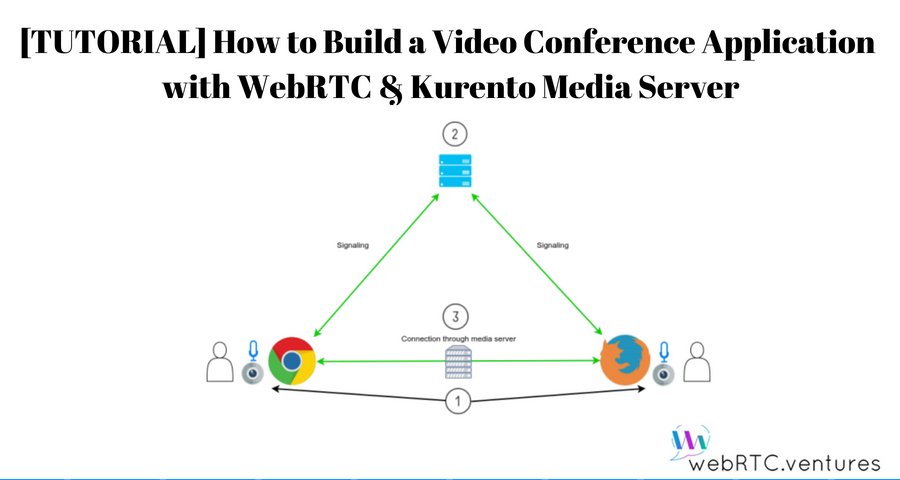
Learning though a tutorial on how to build a video conference application with WebRTC and a Kurento media server is an easy way to see how WebRTC works. Though the original idea behind WebRTC is to establish a peer-to-peer direct connection, a media server is useful to add advanced functionality like recording, multi party and custom processing to the call.We will use Kurento, which is an open source media server, to add support for more than two users to our application. Let’s go over the three-step flow in which we have divided the process for enabling communication through WebRTC:
![]()
![]()
![]()
![]() 1. The browser gets access to the media devices (camera and microphone).
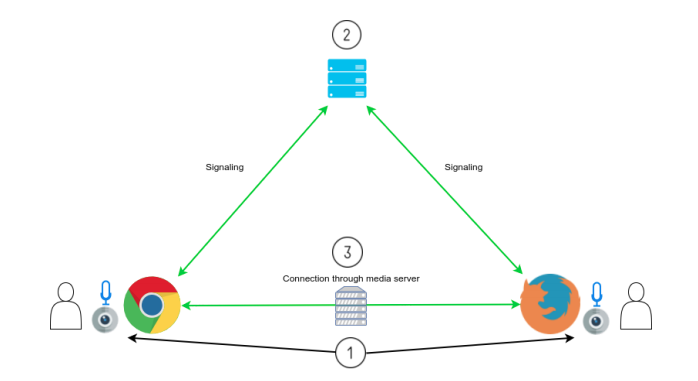
1. The browser gets access to the media devices (camera and microphone).
2. Each peer exchanges information about itself with all other peers through a signaling process.
3. After the information exchange, peers can connect through the media server and the communication begins.
Note that we still need a signaling server for exchanging information and a STUN or TURN server for achieving NAT traversal. Additionally we’re adding a media server for routing the streams to all peers.
The Application
Our application will consist of a login screen, on which the user will type his name and the room name to which he wants to join, as well as a call screen, where he will be able to see the video of all the participants.
The code for this tutorial is available as a public repository on Github, you can clone it to your computer or follow along with us to build it from scratch.
If you’re following along, download the adapter.js and kurento-utils.min.js from the Github repository, you will need them later.
We’re using Javascript as programming language and Node.JS as runtime engine so you’ll need to install node if you don’t have it yet. We will also use Docker for running our media server locally. Check the official links for installing docker.
So let’s begin by creating a folder anywhere you want, this will be our project folder.
Then create another one inside called public, copy the downloaded libraries there now. Now using the command line, navigate to the project folder and type the following commands to install the required dependencies. An internet connection is required to download the libraries.

Also, let’s run our media server. On the command line type the following command:
![]() docker run -d -p 8888:8888 kurento/kurento-media-server:6.6.0
docker run -d -p 8888:8888 kurento/kurento-media-server:6.6.0
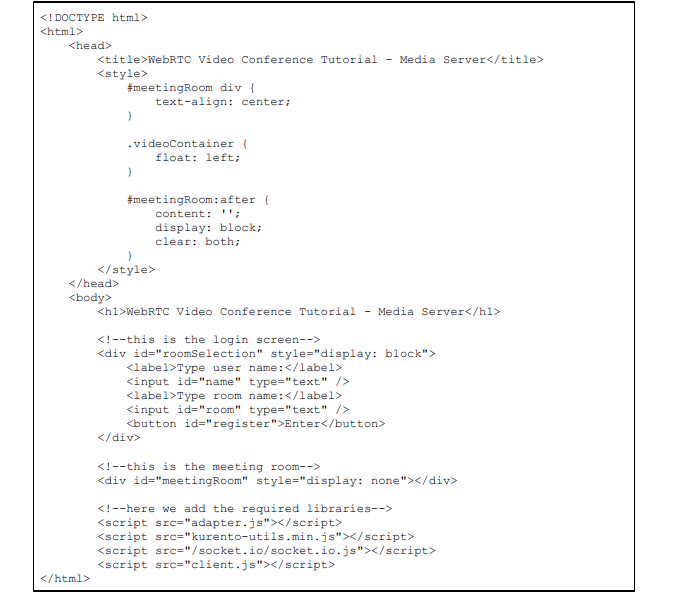
To begin with, we need to create an html file with two divs, one for the login screen and the other for the actual call. Also, we will add the kurento-utils library which requires the adapter.js script and the already known socket.io client library and client.js file.
Using your favorite text editor, create a new file, paste the code below and save it in your project folder, inside public as index.html.
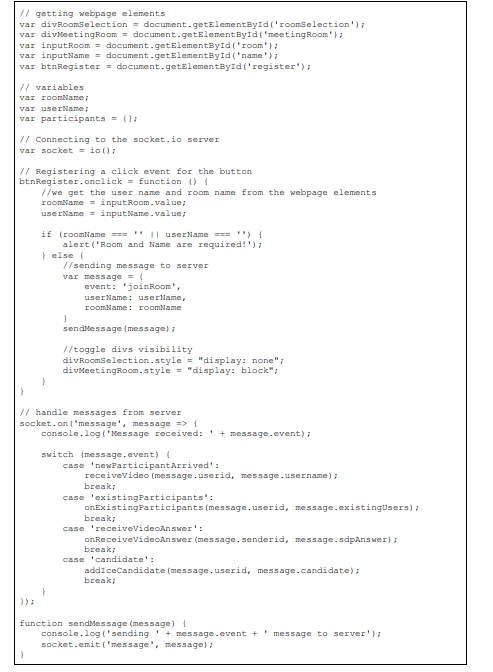
Cool. Now let’s create the client side javascript file. We begin by getting a reference of the webpage elements and declaring variables for client’s username and room name, we also declare a variable for storing a list of the call participants. Then, as was the case in the one-to-one version of the application, we connect to the signaling server using socket.io and register a click event to the button for sending the first message to the server, which is a ‘joinRoom’ message. This time we don’t use the socket.emit() function directly, instead we use an utility function sendMessage() defined at the bottom of the file. We also need to declares handlers for server messages.
Using the text editor create the client.js file as follows and save it on the public folder of your project.
Next, we create a server. We will begin by adding the required imports of node packages. Then we declare a couple of variables to store the Kurento Client reference and a queue for ice candidates received before the creation of a Kurento Endpoint.
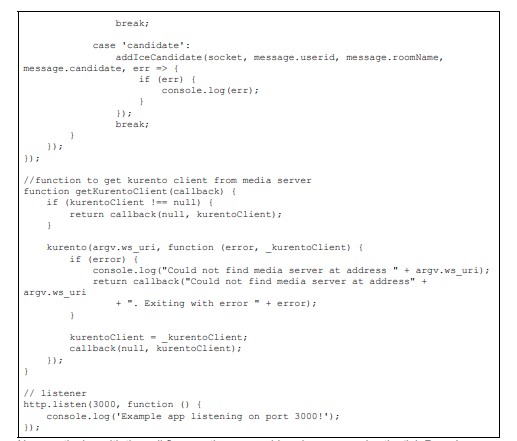
We then set the application’s and kurento server’s urls to the as_uri and ws_uri variables respectively, note that we use the minimist package to add support for setting these values using command line arguments when running.
Next we set up static hosting for the public folder and define the handlers for events received through socket.io. Finally we create a function for getting the Kurento Client reference from the media server and set the listener for the application on port 3000.
With your favorite text editor create the server.js file and save it on your project folder.

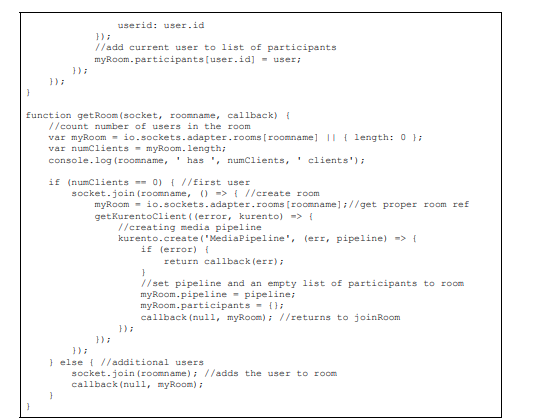
Now continuing with the call flow, on the server side, when we receive the ‘joinRoom’ message sent by the client we call the joinRoom function which in turn use the getRoom function to manage rooms.
On the getRoom function, when the first client arrives we create a new room and a new Kurento MediaPipeline, the pipeline is assigned to the room along with an empty list of participants. When another client arrives we don’t need to create another pipeline so we just add the client to the room.
Returning to the joinRoom function, after we get the room we create a Kurento WebRTC Endpoint which is assigned to the user. Then if there is any ice candidate on queue for the endpoint, it is added to it by calling the endpoint’s addIceCandidate function, then we set its onIceCandidate event.
We end the function by sending two messages: one for the other users in the room notifying them about the new participant and another one for the current user with the list of existing participants. Add the mentioned functions to server.js as follows.

On the client side, two functions are in charge of handling the ‘newParticipantArrived’ and ‘existingParticipants’ events sent by the server, these are receiveVideo and onExistingParticipants.
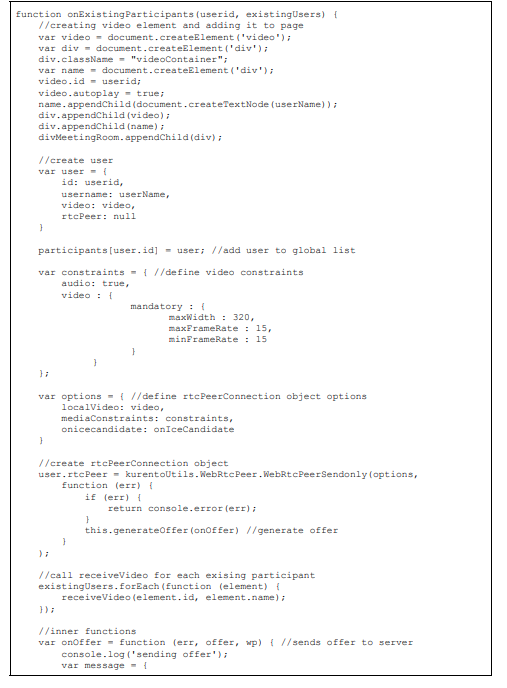
First thing we will do in the onNewParticipants function is to create the video element for showing the stream and create an user for the current participant. The user object will store the newly created video element and an rtcPeer field.
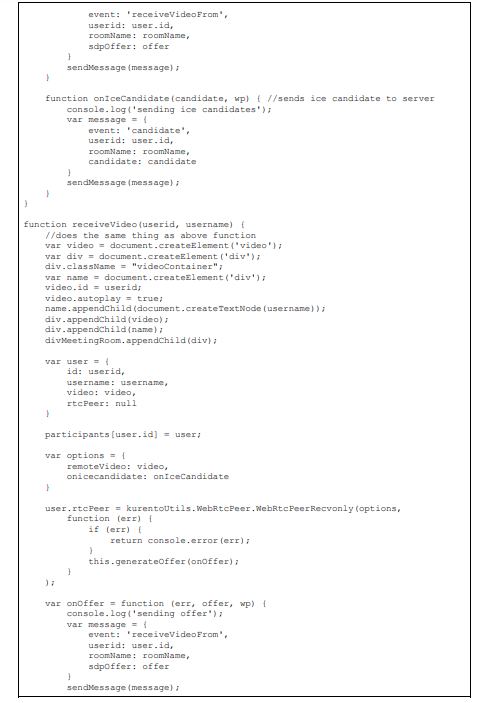
Then after we store the user object on the global participant array, we create the Kurento’s implementation of the RTCPeerConnection API object and assign it to the rtcPeer field and prepare an offer to begin with the signaling process. The function ends by calling the receiveVideo function, which does the same process but this time for each one of the other participants on the call and it’s also called whenever a new participant joins.
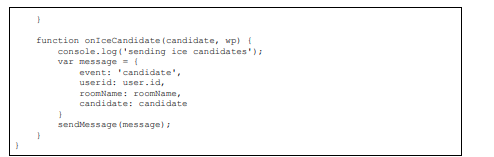
Each function has their own pair of inner functions for onOffer and onIceCandidate events which are triggered by the rtcPeer object, they’re in charge of sending the actual offer and ice candidates to the server when ready, sending the ‘receiveVideoFrom’ and ‘candidate’ messages respectively. Add code below to client.js.
Up to now, the first step is done and the signaling process has begun.
![]()
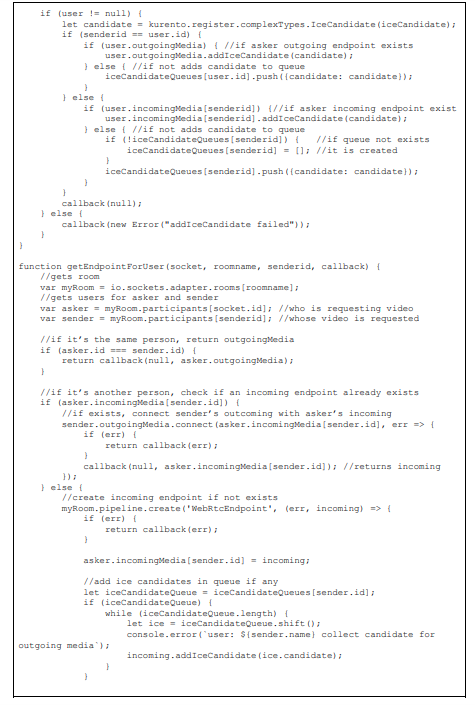
On the server side the ‘receiveVideoFrom’ and ‘candidate’ events are handled by the receiveVideoFrom and addIceCandidate functions. A third function called getEndpointForUser is also used to retrieve the Kurento WebRTC Endpoints associated with each user.
The receiveVideoFrom function will be really simple: after it gets the proper endpoint, it process the offer, generates an answer, sends it to client and begins to gather ice candidates. In the same way, the addIceCandidate function receives an ICE Candidate and adds it to the correspondent endpoint. The getEndpointForUser gets the right endpoint to receive video from. Add the code below to server.js.


Then on the client side we need to handle the ‘receiveVideoAnswer’ and ‘candidates’ events emitted by the server, this is done using the onReceiveVideoAnswer and addIceCandidate functions respectively. Add them to client.js file.

With the above code, the signaling process ends so we can mark done the step 2 on our flow.
![]()
And do you want to know more great news? As we are using kurento-utils library on client side, there are no further actions required from our side to begin with communication, so step 3 is automatically done.
![]()
Now it’s time to run the application. On the command line, navigate to project folder and type the following command:
![]()
Then using Google Chrome or Mozilla Firefox, open http://localhost:3000 on three or more separated tabs, type different participant names and the same room name on all tabs and click Enter.
You have created your 2nd video conference application.
Want to leave it to the experts?
If you are ready to chat about how you can incorporate a video conference app into your business? We have an experienced team ready & happy to help you out. Contact us today.