Facebook Messenger, Hangouts, Slack: Are you familiar with any of these apps? Do you know what they all have in common? The answer is all of them use WebRTC technology for client to client video conversations. Our team at WebRTC.ventures builds iOS apps like this with WebRTC, and so can you!
In this blog post we will investigate how to get started building WebRTC into your iOS app. We will use the native libraries provided by TokBox. The code in this article does not represent a complete working application, so I also recommend taking a look at the TokBox team’s reference documentation Set up a Basic iOS Client (Swift).
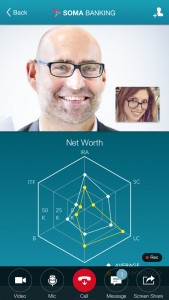
Example of an iOS app built with Tokbox as an example of financial services. In an app like this, you can mix the video communications component with other relevant contextual data.
For example, a wealth advisor might want to show you information about your retirement portfolio inside the same secure app where they are communicating with you.
Project Configuration
The first thing you’ll need is the TokBox library itself. The library we’re using for this tutorial is maintained by TokBox engineers and published using Cocoapods, from my point of view, the best dependency manager for Swift & Objective-C Cocoa projects. You can quickly get started on a new iOS project with a few simple steps:
# Install cocoapods in the terminal:

sudo gem install cocoapods

# Create a podfile in the root directory of your Xcode project:

pod init

# Add OpenTok to your Podfile:

echo "pod 'OpenTok'" > Podfile

# Fetch OpenTok and any dependencies:

pod install
On a second step you will need to grant microphone and camera permissions on your iOS app, otherwise you will get several errors during compilation & runtime. Open your Info.plist file and include the following two keys and values:
Privacy - Camera Usage Description:

$(PRODUCT_NAME) uses the camera.

Privacy - Microphone Usage Description:

$(PRODUCT_NAME) uses the microphone.
The last step of the configuration phase will be to obtain the authentication credentials and include them on your project as variables. In a production application, these credentials should be generated by a server, but to speed things up we will just hardcode the values for now.
Sessions (connecting, publishing & subscribing)
Every video chat occurs within a session. You can think of a session as a “room” where clients can interact with one another in real-time. Sessions are hosted on the cloud and manage user connections, audio/video streams and user events.
When the user loads the client-side app will use the session ID and token to establish a connection with the session. On your app you will need to instantiate an OTSession object and call its connect method:
class ViewController: UIViewController {

 var session: OTSession?

 func connectToAnOpenTokSession() {

  session = OTSession(apiKey: kApiKey, sessionId: kSessionId, delegate: self)

  var error: OTError?

  session?.connect(withToken: kToken, error: &error)

 }

}
Once the app is connected to the session, you will want to publish an audio/video stream using the device camera and microphone. To start streaming you will need to instantiate an OTPublisher object and send it as parameter on the publish method from session:
class ViewController: UIViewController {

 var publisher: OTPublisher?

 func sessionDidConnect(_ session: OTSession) {

  let settings = OTPublisherSettings()

  settings.name = UIDevice.current.name

  guard let publisher = OTPublisher(delegate: self, settings: settings) else {

   return

  }

  var error: OTError?

  session.publish(publisher, error: &error)

 }

}
Finally we want to be able to detect when any other client connects to the session and subscribe to their streams in a session.
class ViewController: UIViewController {

 var subscriber: OTSubscriber?

 func session(_ session: OTSession, streamCreated stream: OTStream) {

  subscriber = OTSubscriber(stream: stream, delegate: self)

  guard let subscriber = subscriber else {

   return

  }

  var error: OTError?

  session.subscribe(subscriber, error: &error)

 }

}
New in iOS 10: CallKit
CallKit is Apple’s library integrated alongside the release of the iOS 10. CallKit allows your app to ring the device as if it were a regular phone call, previously a functionality only allowed to native apps like Phone or FaceTime.
This new library was introduced to solve a common intractable problem: before this release any audio/video call had to be placed and received from within the app, and only when the device is unlocked and the app running on foreground. With this new addition apps can more fully integrate traditional phone experiences into audio/video apps.
To receive incoming calls as regular phone call your app needs to report the incoming call to the global instance of the CXProvider object.
class ViewController: UIViewController {

 let providerConfiguration = CXProviderConfiguration(localizedName: “your app name”)

 var provider: CXProvider?

 override func viewDidLoad() {

  super.viewDidLoad()

  provider = CXProvider(configuration: type(of: self).providerConfiguration)

 }

}
Allowing native support for traditional phone like features in iOS is a clear signal about the future of mobile communications. Any single developer can make an iOS app nearly indistinguishable from any other communication giant like the Apps we mentioned before.
As you can see, the integration of WebRTC on iOS is pretty simple and straightforward once you know how they relate to their counterparts. WebRTC opens up communications to all of us and it enables a lot more than video chat, I have seen industries such as healthcare, education, financial services and many others integrating this technology on their applications.
So now… go out there and hop on board!!!
Are you interested in building an iOS application with Tokbox or WebRTC? Contact our team for a quote on how we can build and deploy your application for you! Our team offers complete UX, design, development, testing and deployment services for a variety of industries utilizing video communications.


